Arkansas State Parks Tour

Sunset on DeGray Lake with text "Arkansas State Parks Tour: Adventure Awaits in the Natural State"

A tour of all the state parks in Arkansas is something I have been brainstorming about and getting pumped about over the last  few months, but I haven’t taken the time to get it all down until now! The physical Arkansas State Parks Tour is already underway, however. I have my {hiking} boots on the ground scouting out some of these overlooked (by me, at least) gems, and I’m thrilled to share them with you!

What does a tour of the Arkansas State Parks entail?

I’m glad you asked. I plan to visit each of the 52 State Parks of Arkansas and report back here about their history, their scenic gems, their must-see spots, and also answer your most burning questions, things like: “Can you camp there?” “Are there hiking trails and which ones are most recommended.” “Can you get a penny stamped (quite possibly the number one question on the list for my kid)?” “What are the educational facilities like?” I will be addressing more than this, but if you have a question you think I should add to the list, let me know!

Why a tour of the Arkansas State Parks?

As a family that loves exploring the outdoors, we have great fondness and appreciation for our National Parks System, but we also know that we have access to so many great parks right here in The Natural State!

Plus, we have a tendency to return back to the same parks over and over again even though we miss out on visiting all the other gems within the Arkansas State Parks system.

Lastly, we want to show them off to you and hopefully encourage all of you to come and visit them as well.

When will this tour kick off?

I’ve already begun visiting some of the Arkansas State Parks that until now were not even on my radar, and of course I will be highlighting some of our favorites that we can’t get enough of…so, you can look for the first stop on our tour to be posted next week!

Anniversary Adventures {Devil’s Den State Park}

This year our anniversary kind of snuck up on me. I wasn’t even upset when Jeremy was scrambling around trying to make last-minute anniversary plans. I was in the same boat. What should we do? Where should we go? Who is going to be available to watch Coen at the last minute? Finally, I told him that all I really wanted was to go eat breakfast and then hike together as a family.

Hiking at the Devil's Den Self-Guided Trail for our 11th anniversary

I picked out a trail that I’ve been wanting to explore myself before taking my Girls Who Hike group out on, but Jeremy balked at the distance from our house. I was disappointed and annoyed, and I let it be known, but I agreed to go hike somewhere closer. Compromise. It’s kind of important in marriage. Also, apparently, important in anniversary planning.

By the time we go in the car to head out for breakfast, I was already in a better mood. Feeling better about the hike since it was a new trail at least. We were going to hike at Devil’s Den, a local state park that I’ve hiked at before, but a trail I hadn’t been on yet.

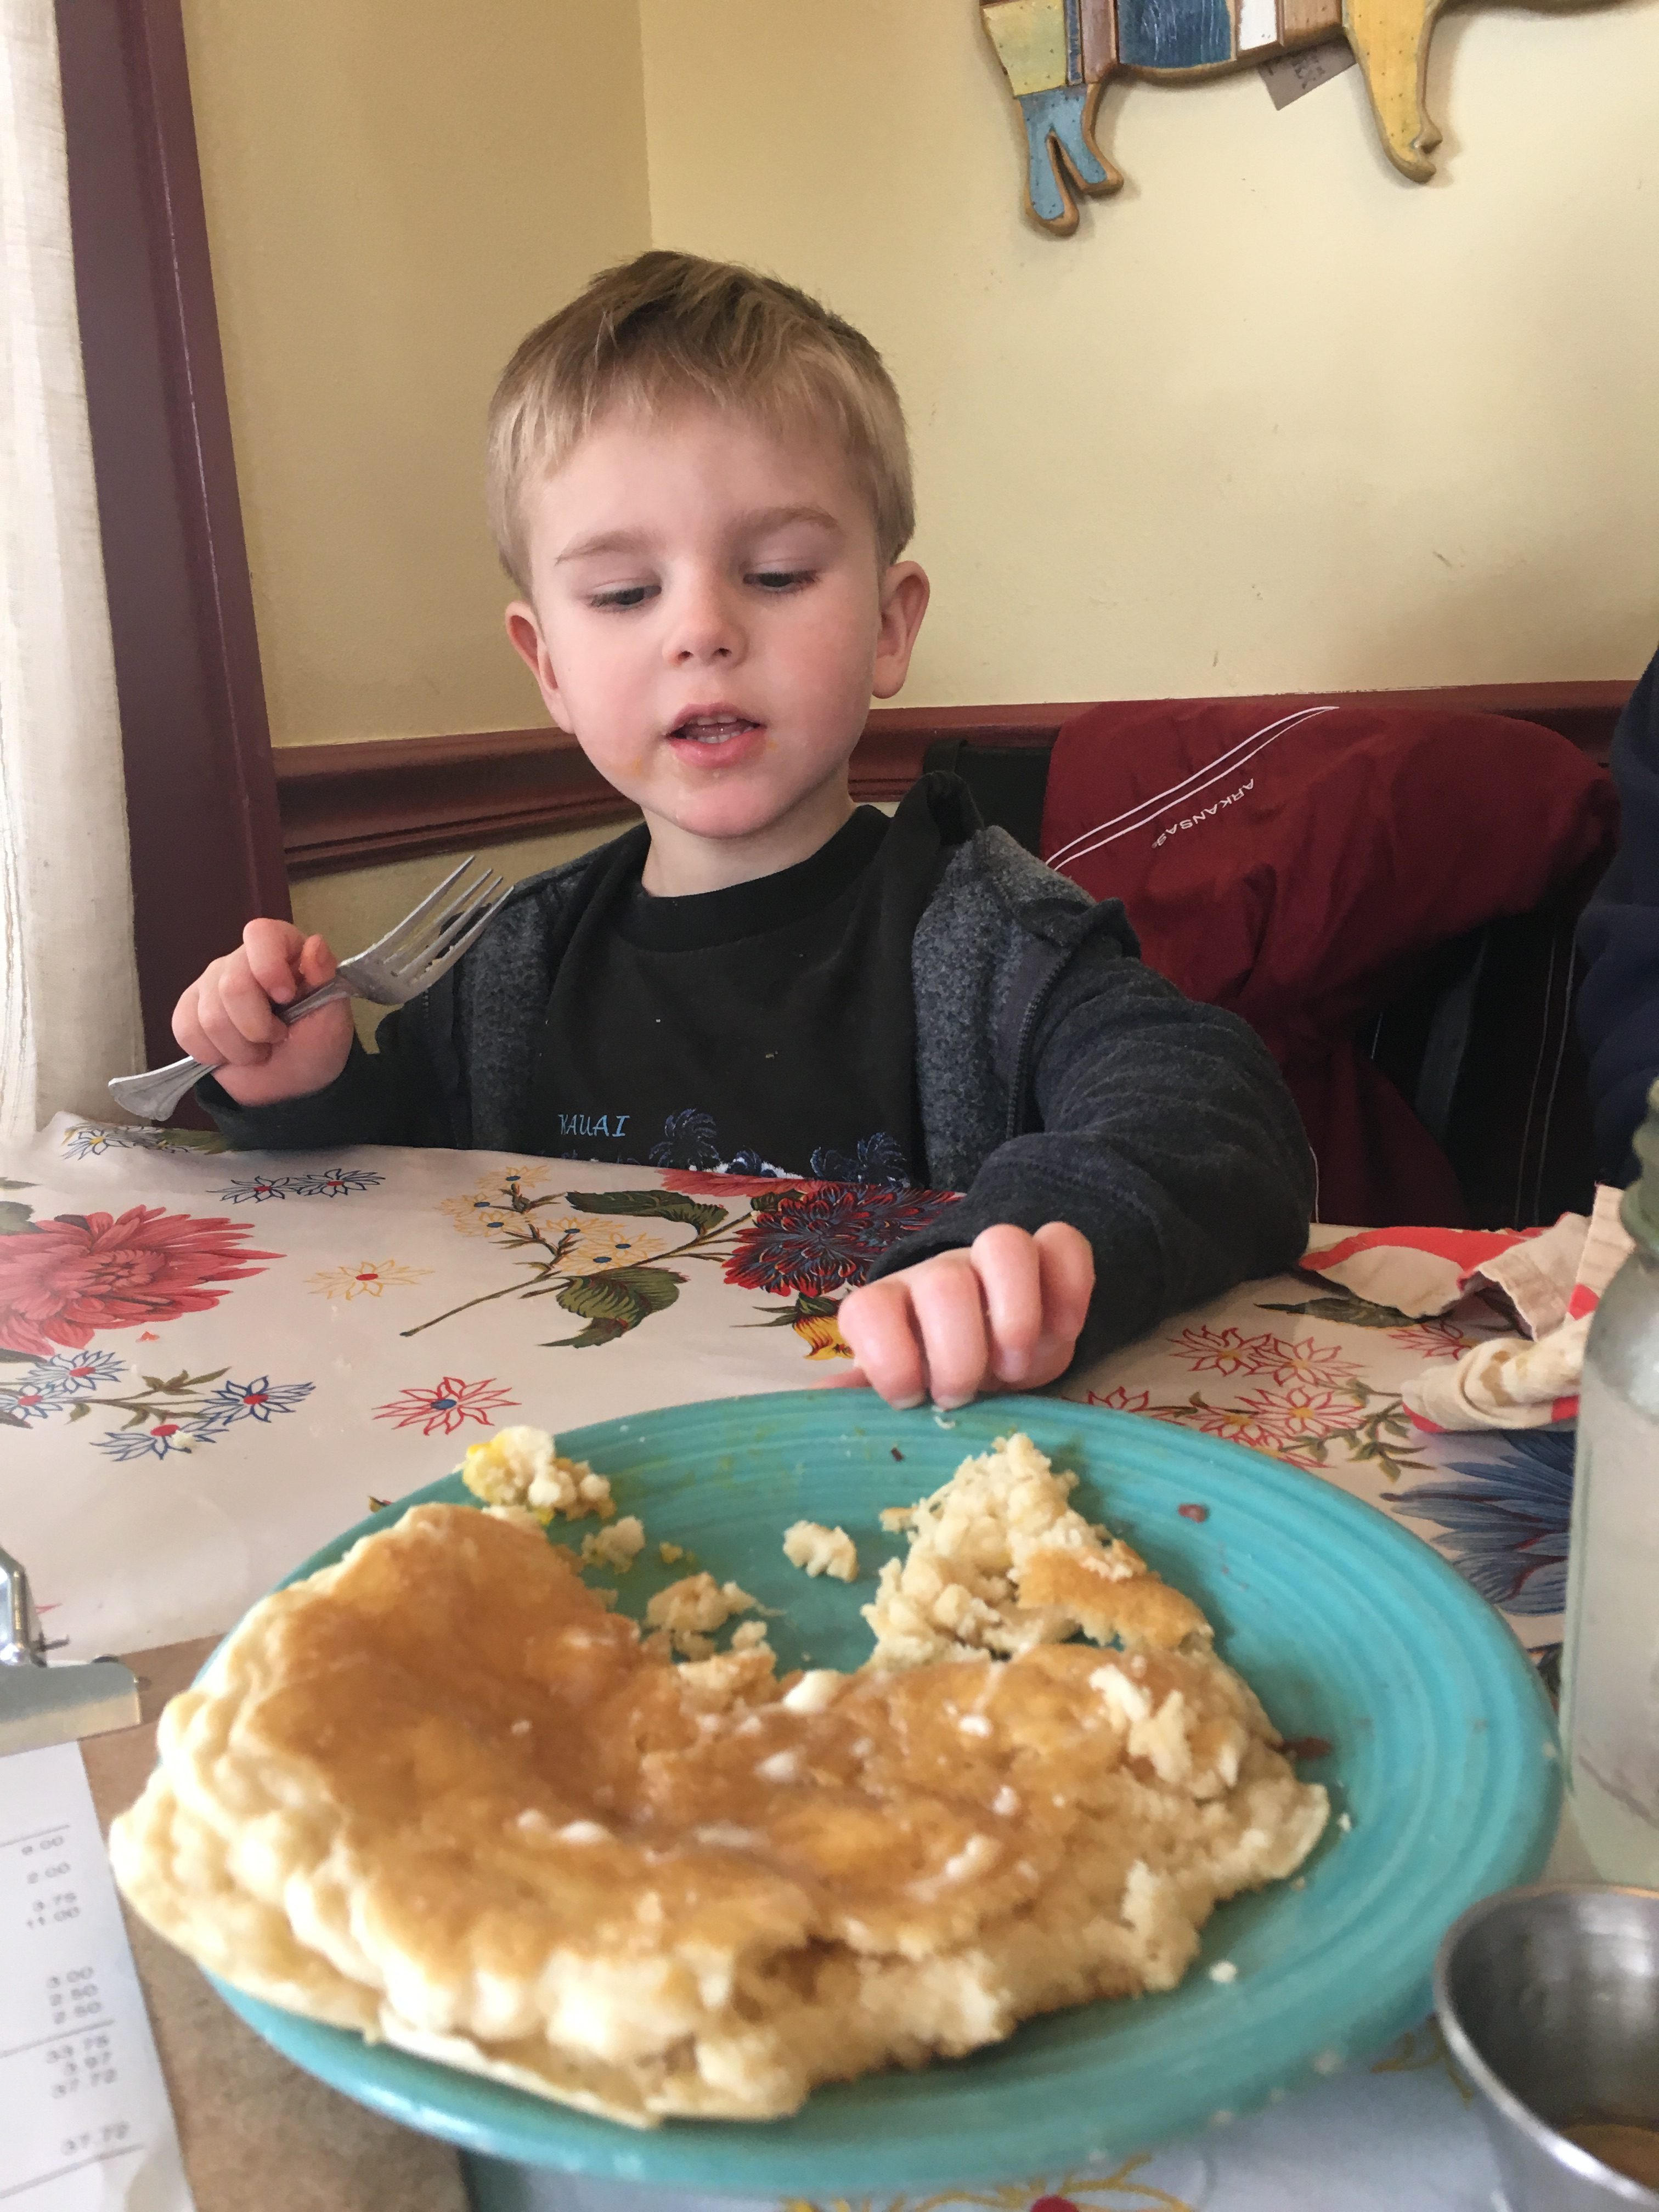
Breakfast at The Farmer’s Table

Farmer's Table breakfast for our 11th anniversary Farmer's Table breakfast for our 11th anniversary

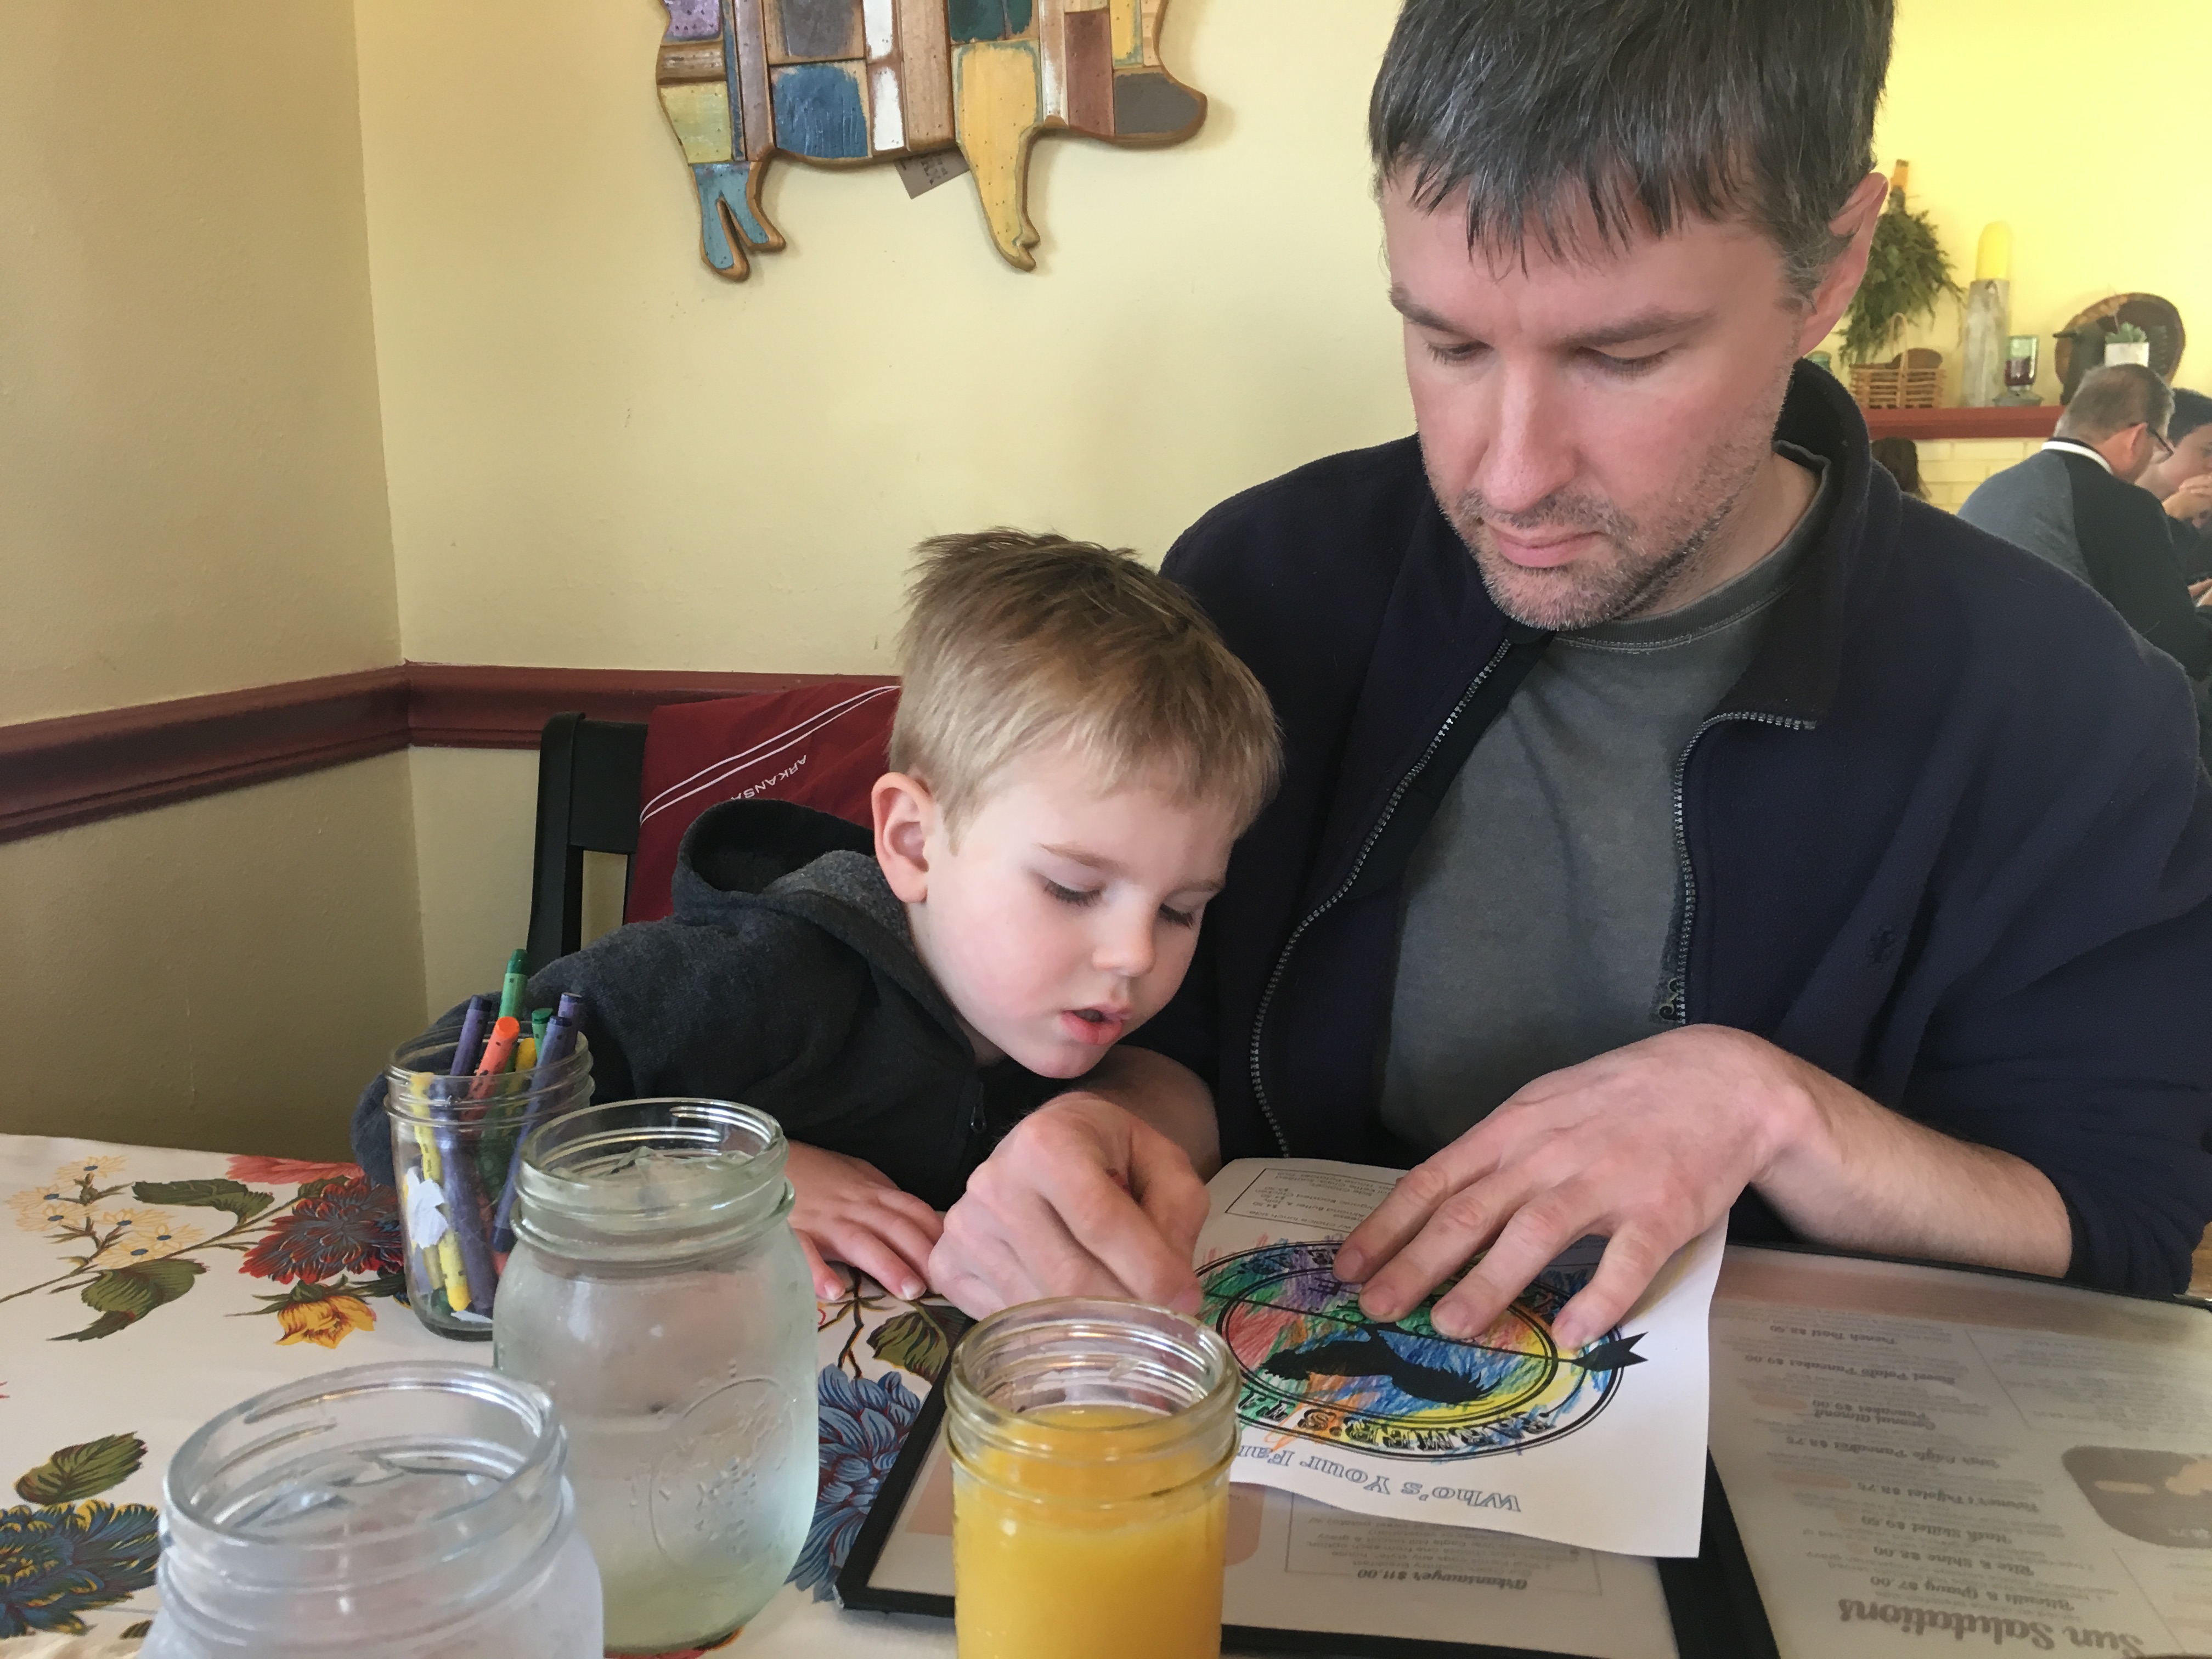
I perked up even more once I realized that The Farmer’s Table was now serving vegan pancakes! Coen loves pancakes, but we usually don’t order them at restaurants since he can’t have dairy. I ordered the pancakes to split and added an egg and bacon on the side. Jeremy got the Arkansawyer which came with regular pancakes and just about everything else.

Farmer's Table breakfast for our 11th anniversary

Once we had our fill of breakfast, we set off for the trail.

The road Jeremy decided to take got us to the trailhead more quickly, but it also involved several hairpin curves. I’d never driven to Devil’s Den that way and started to get a little queasy. Luckily, the curves ended and we arrived at the visitor’s center without incident (ie: I wasn’t revisited by my breakfast).
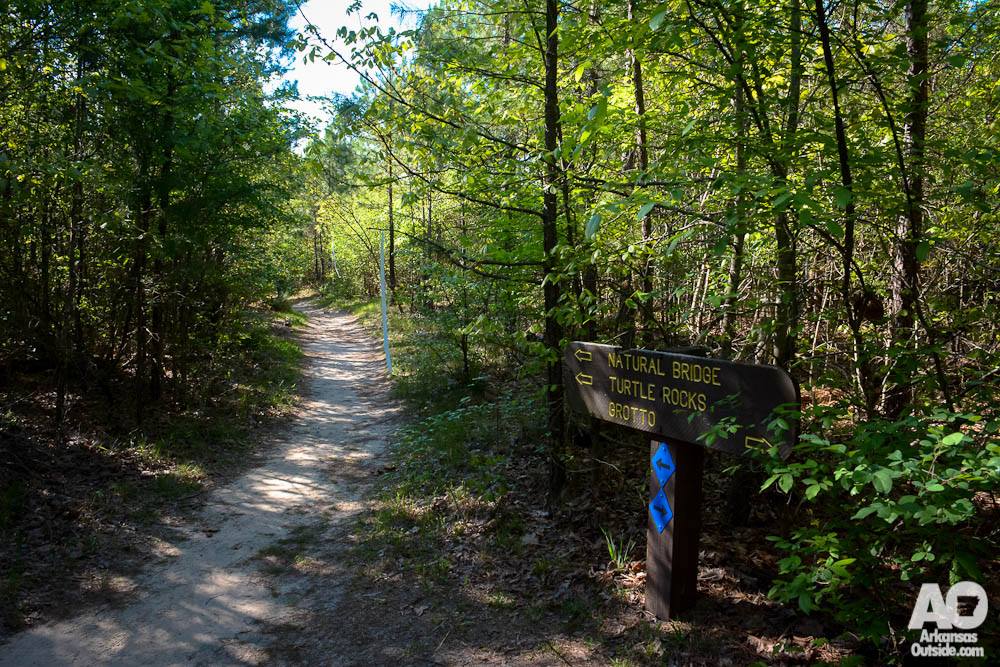
Devil’s Den Trail

Hiking at the Devil's Den Self-Guided Trail for our 11th anniversary

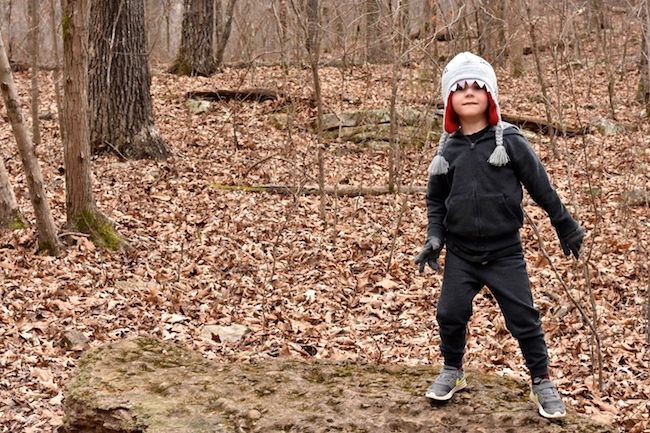
We decided to hike the Devil’s Den trail, a 1.5 mile loop that features caves, rock formations and some falls. The caves are currently closed due to white nose syndrome, but there is still plenty to explore.

Hiking at the Devil's Den Self-Guided Trail for our 11th anniversary

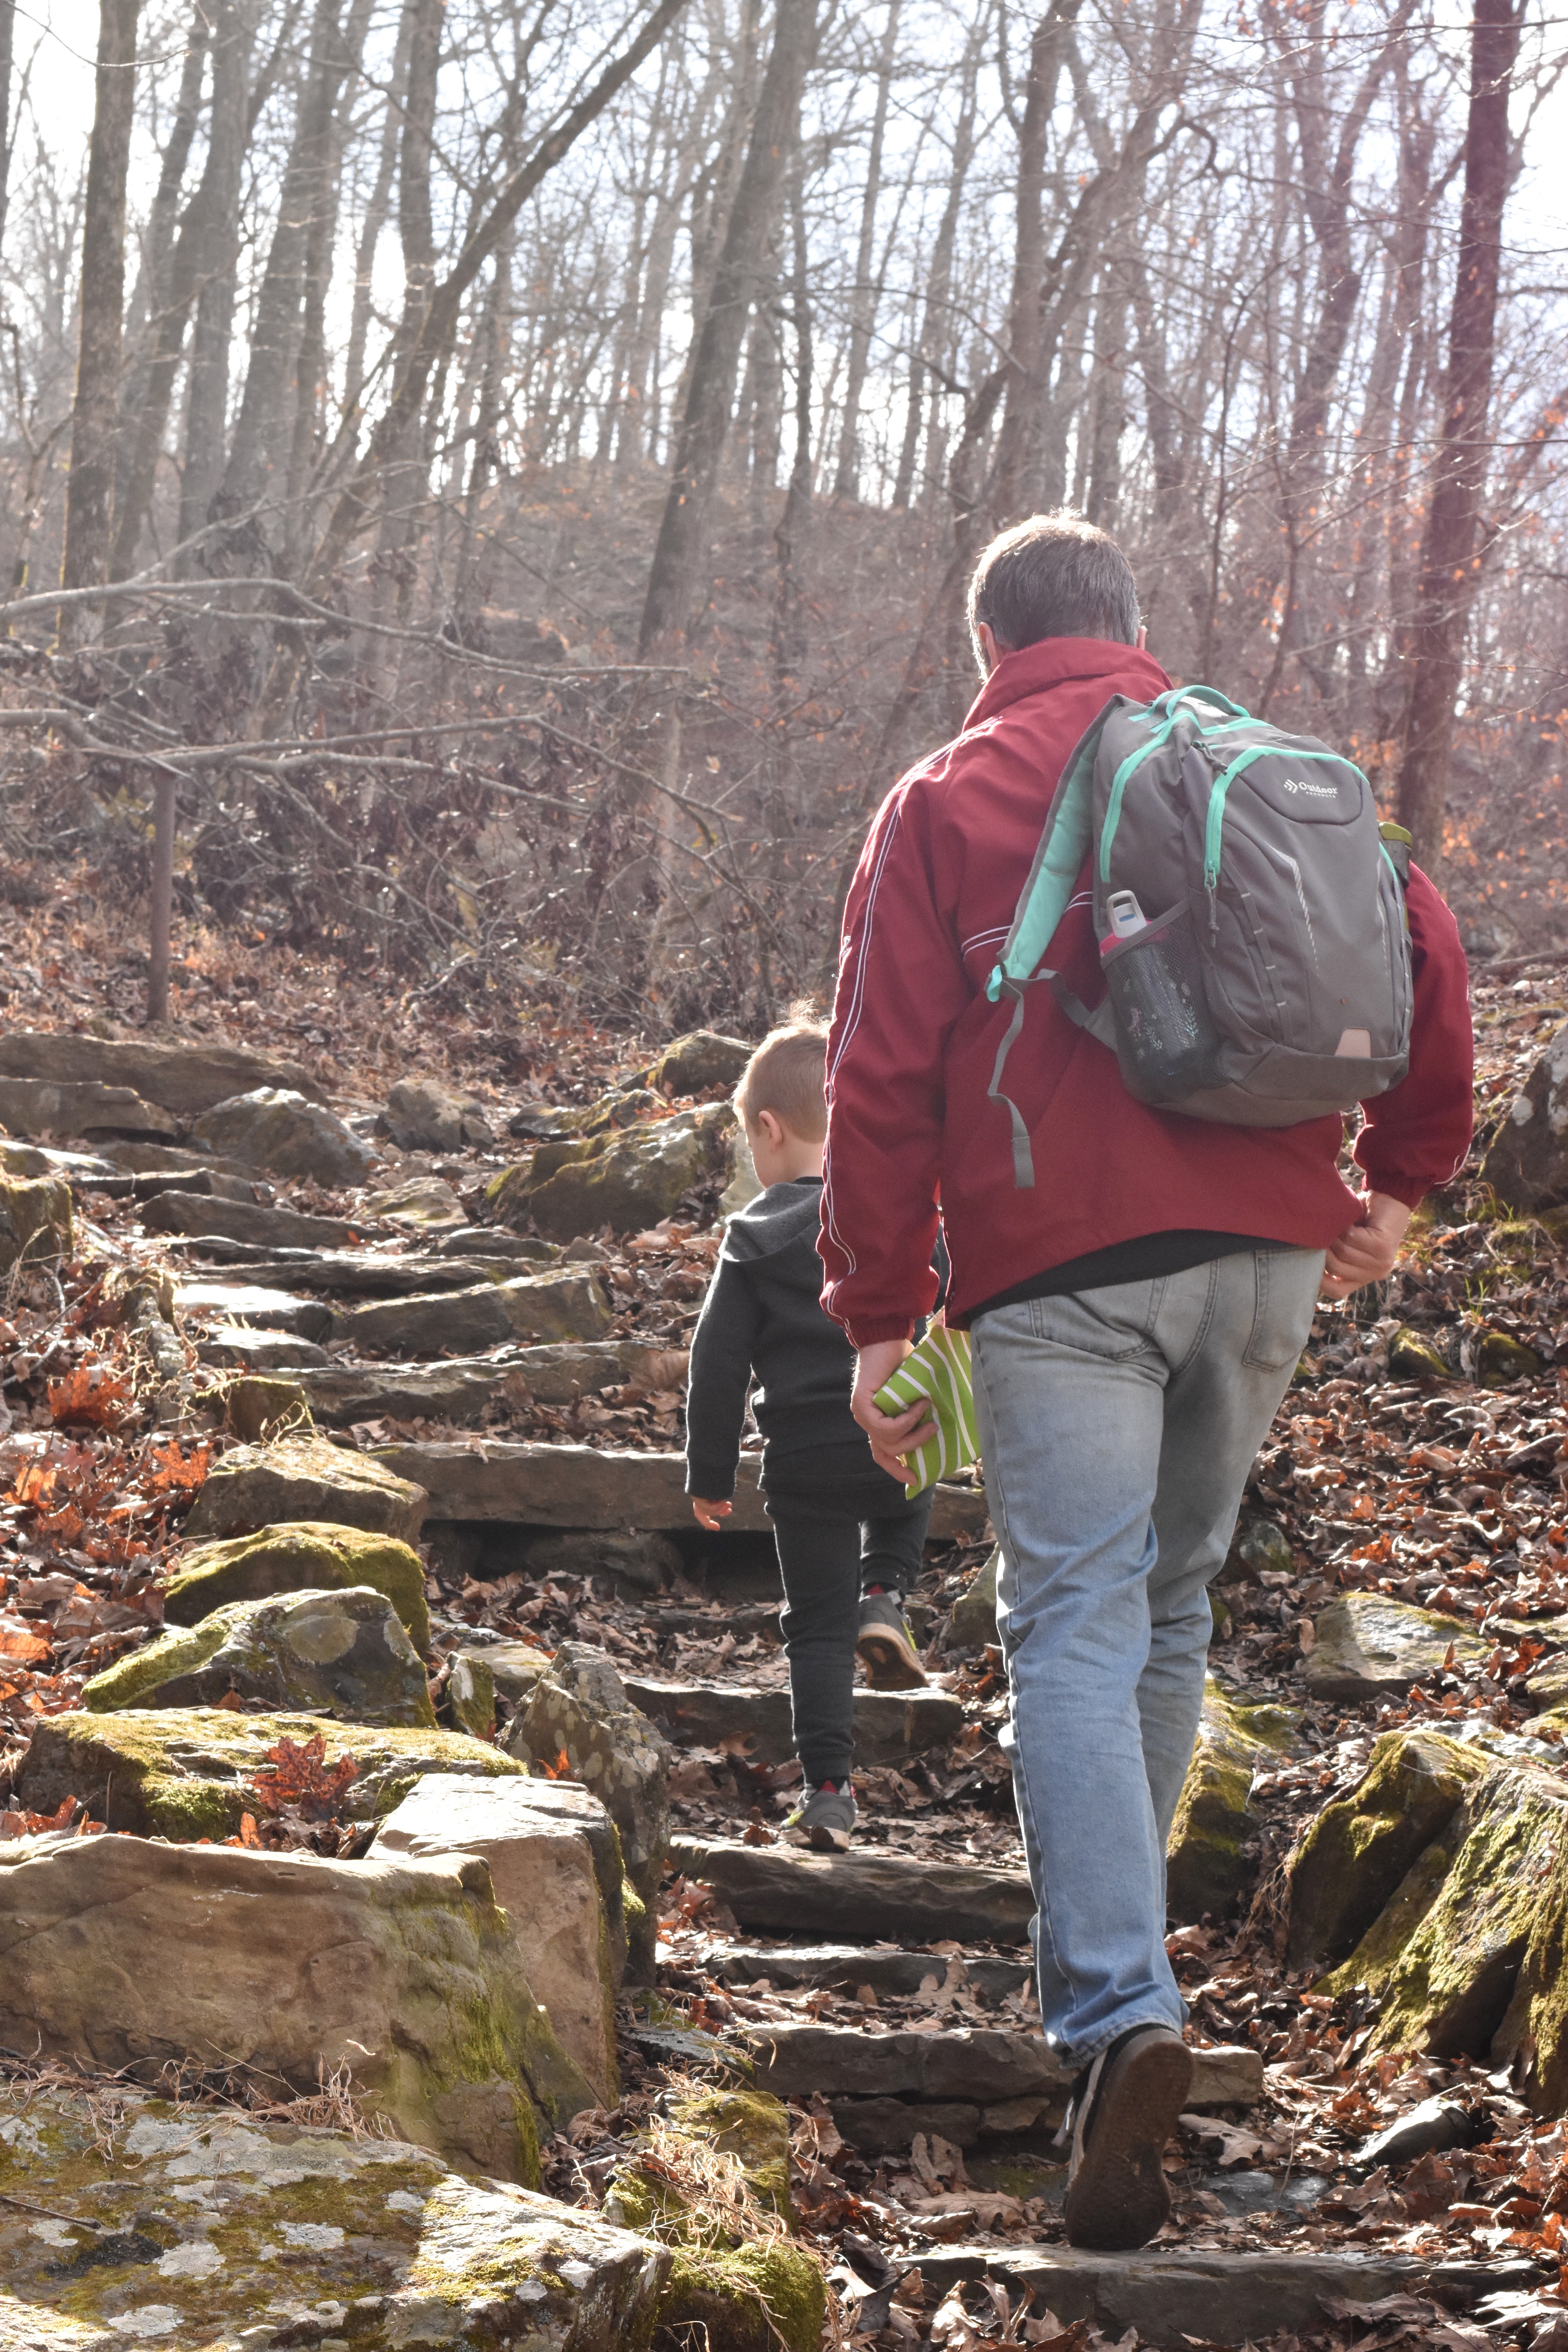
As we begun our hike, we discussed the trail markings and leave no trace with Coen as a refresher. At the beginning of a hike, I always bring up the fact that we cannot take any trail treasures home with us. For Coen, the most tempting things to bring home are rocks and sticks. I let him know that we can take a picture of any rock he likes instead of trying to take them home with us.

Hiking at the Devil's Den Self-Guided Trail for our 11th anniversary

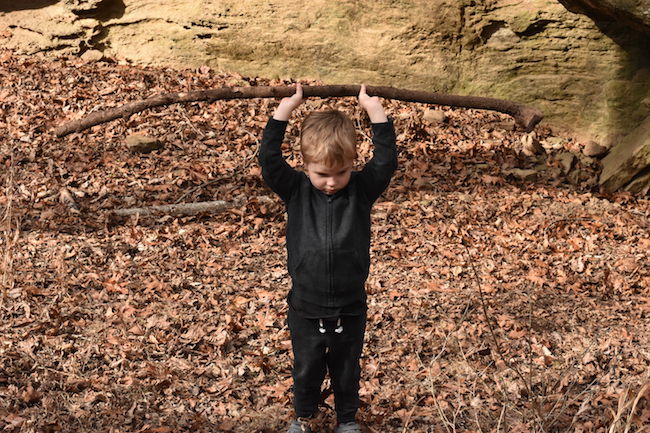
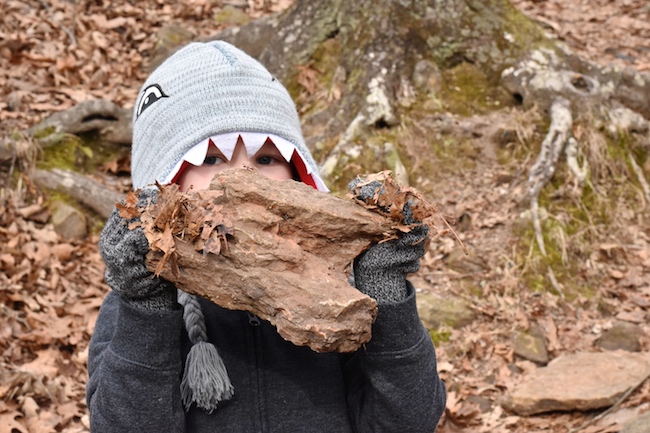
Most of the time this goes over well, and Coen moves along happily after taking a photo. However, he did come across one really cool stick that he wanted to bring home with him. It looked like a pickaxe and even I had to admit it was not like the sticks in our yard. (Another thing we tell him is that there are plenty of sticks in our yard at home).

After we took a photo of a not-so-thrilled Coen with the stick, we moved on.

Hiking at the Devil's Den Self-Guided Trail for our 11th anniversary

Hiking at the Devil's Den Self-Guided Trail for our 11th anniversary

Hiking at the Devil's Den Self-Guided Trail for our 11th anniversary

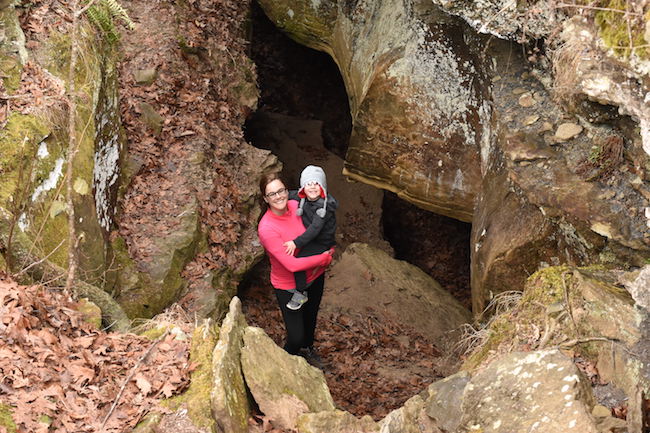
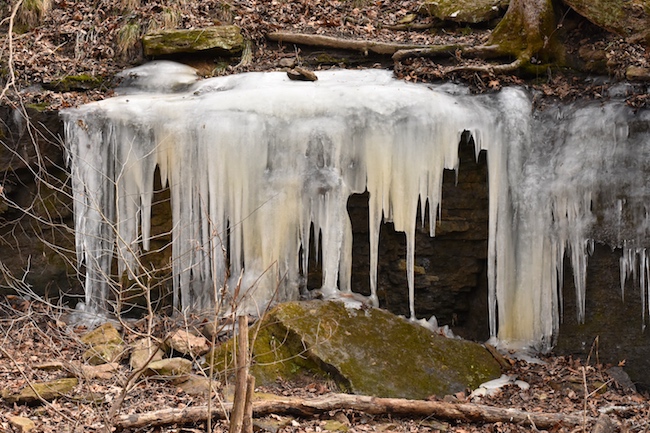
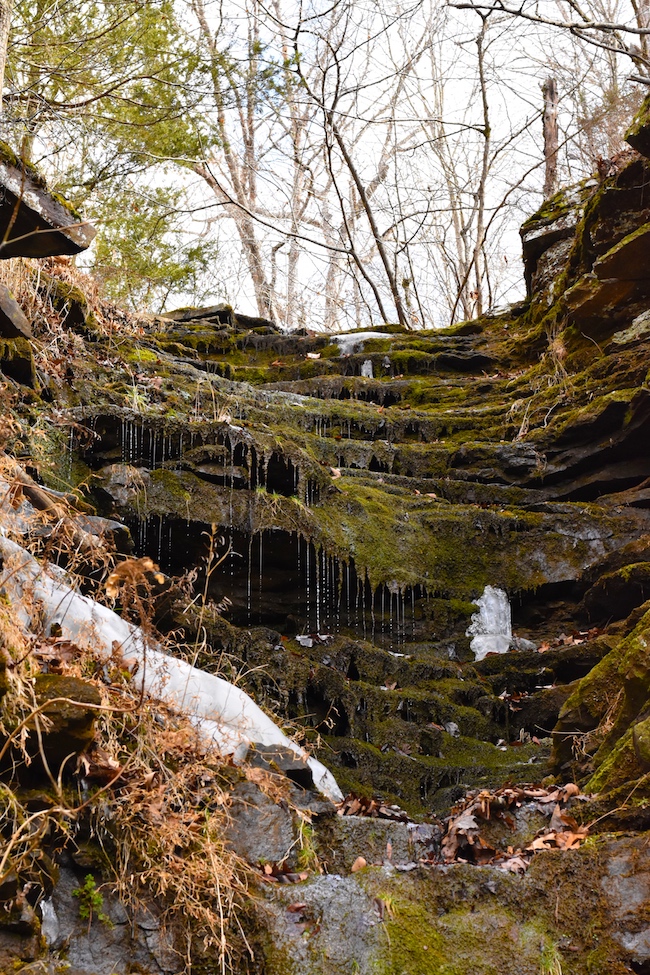
Even though the caves were closed, I was glad that I brought our headlamps on this hike. There were still plenty of deep, dark places to explore further. At one point, Jeremy wanted to go down into one such area while Coen wanted to go up and over. So we handed off the headlamp and began to climb.

Hiking at the Devil's Den Self-Guided Trail for our 11th anniversary

Once we were on top of the rocks Jeremy was under, we were rewarded with a great view of some frozen falls. We were even more thrilled to find a downed tree to use as a bridge to reach the falls.

Hiking at the Devil's Den Self-Guided Trail for our 11th anniversary Hiking at the Devil's Den Self-Guided Trail for our 11th anniversary Hiking at the Devil's Den Self-Guided Trail for our 11th anniversary

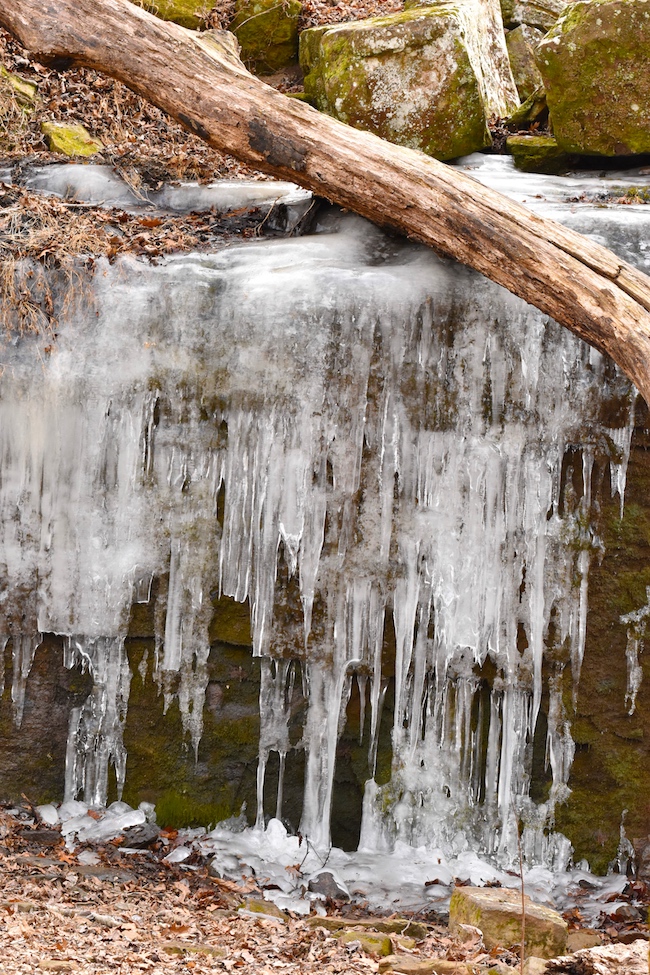
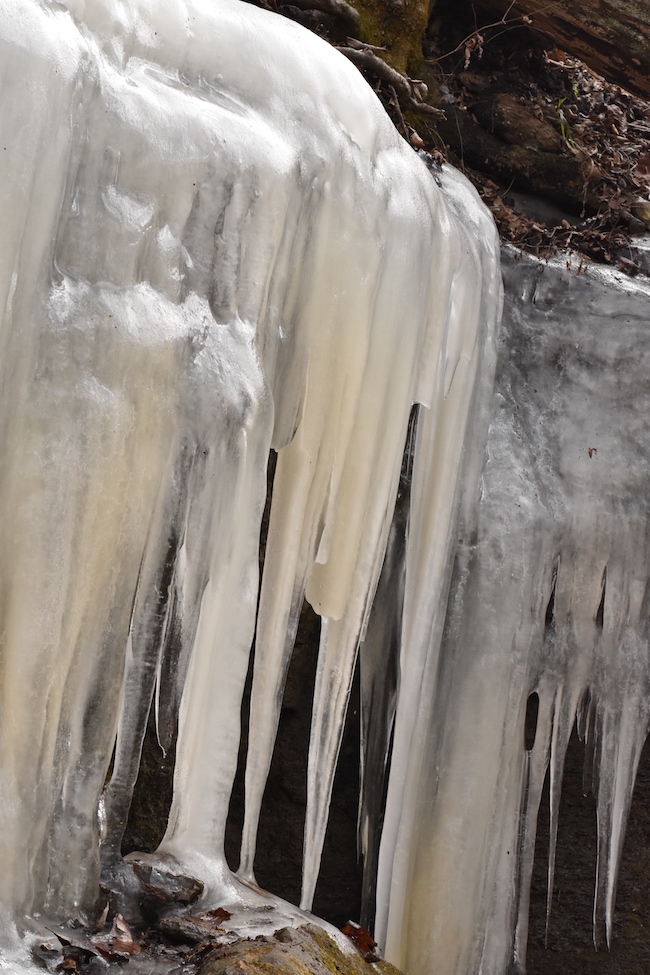
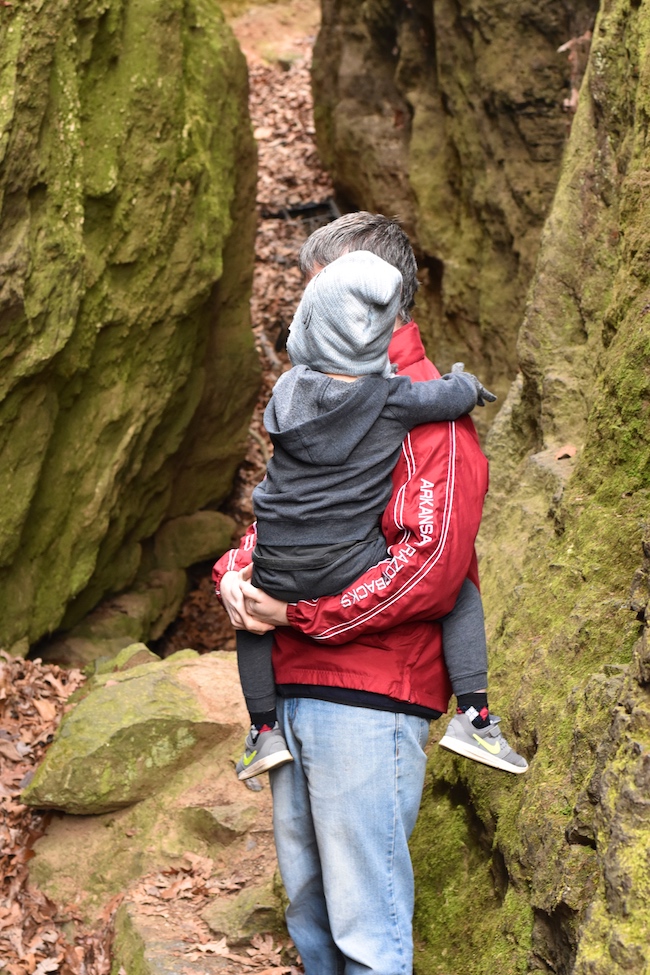
We were enjoying ourselves so much that we kind of forgot that Jeremy might be wondering where we were. As I was repeating to Coen to please leave the icicles for others to enjoy, I heard a familiar whistle. I hollered back towards where we had left Jeremy to let him know we were okay. He ran up to us, breathless and obviously concerned. It was a reminder that we always have someone looking out for our wellbeing and safety.

We started to get pelted by the birds and that was our cue to head back towards the trail.

Hiking at the Devil's Den Self-Guided Trail for our 11th anniversary Hiking at the Devil's Den Self-Guided Trail for our 11th anniversary

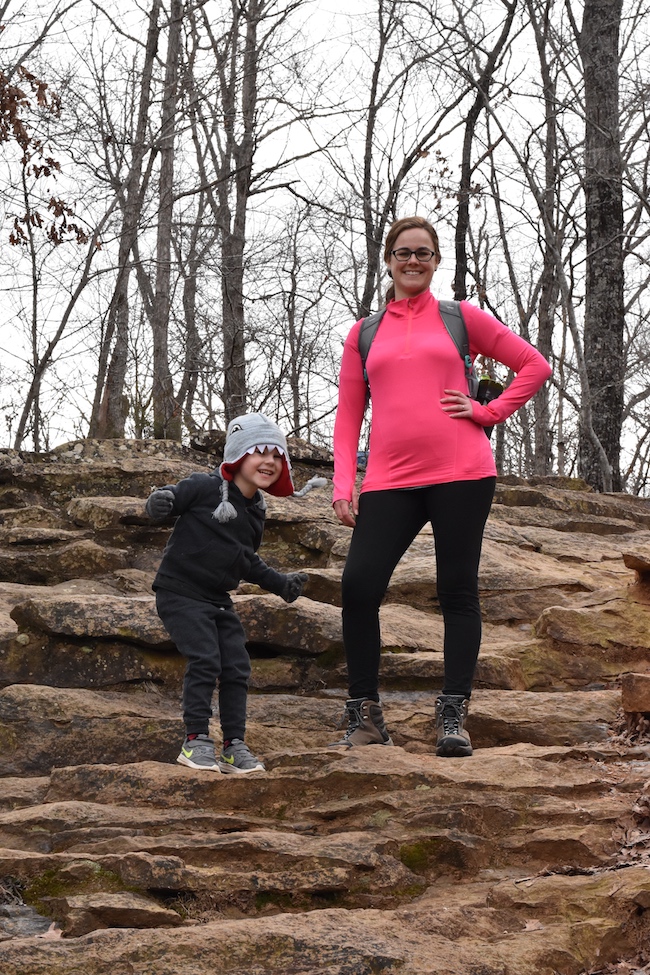
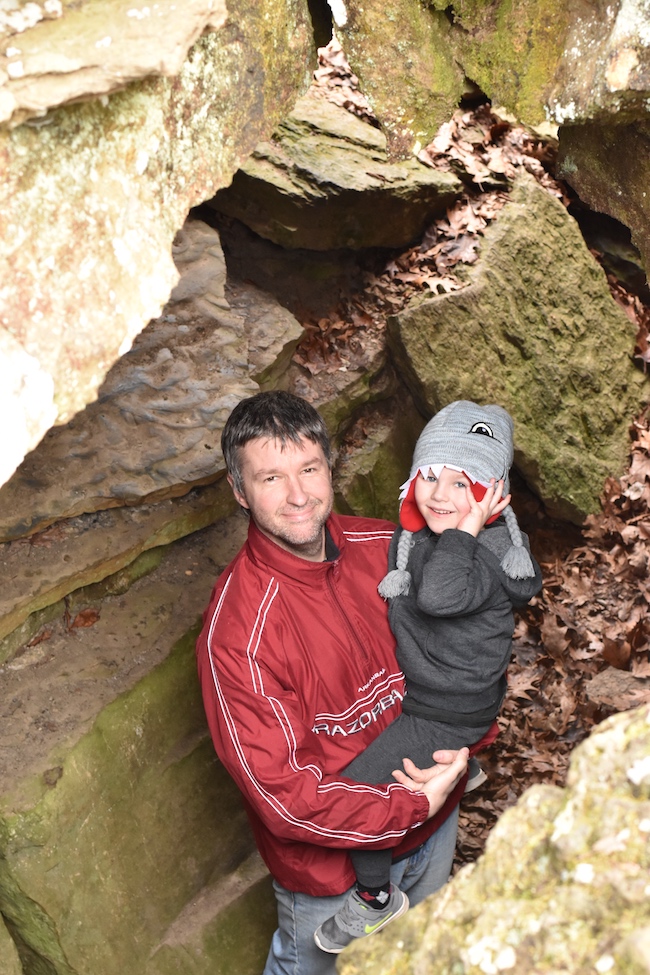
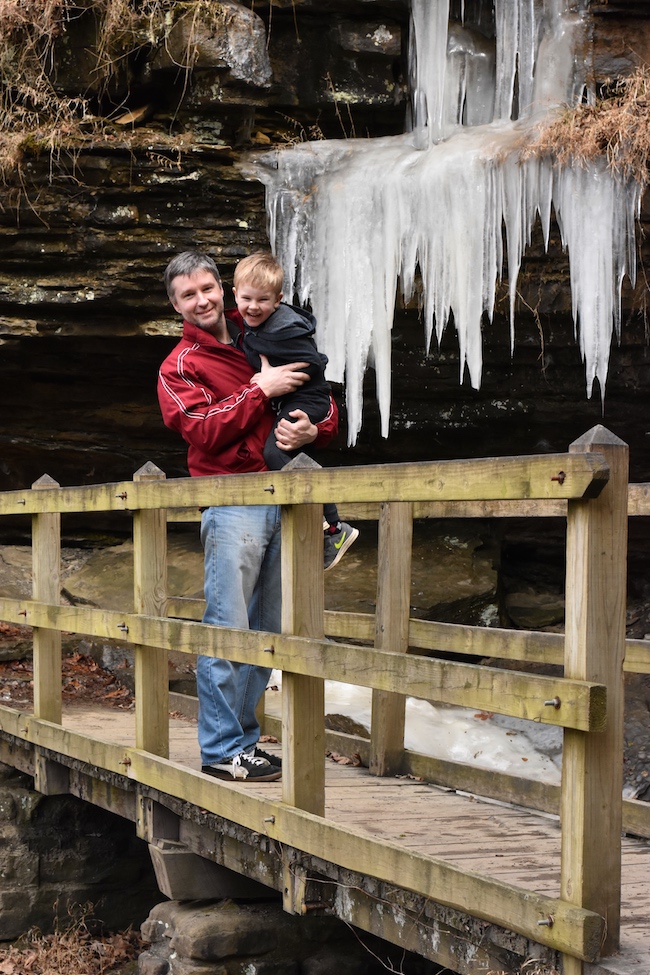
While we were stopped to take a break and eat a snack, a mom coming down the trail noticed me trying to get a family selfie and offered to take a picture for us. We seem to meet the kindest, most affable people when we’re in the outdoors. Another family took our photo on the bridge by Twin Falls after I offered to do the same for them.

Hiking at the Devil's Den Self-Guided Trail for our 11th anniversary Hiking at the Devil's Den Self-Guided Trail for our 11th anniversary Hiking at the Devil's Den Self-Guided Trail for our 11th anniversary

I have to admit that the hike we ended up taking was a pretty great one. I’m glad that we spent our anniversary in nature with the whole family. I’m looking forward to spending even more weekends out on the trails in Northwest Arkansas in the coming months!

Hiking at the Devil's Den Self-Guided Trail for our 11th anniversary

Thanks for reading! You may also want to read about the 10K Women Trail Project or my newfound Trail Tribe.

Easy No Poo Method How To

No, I’m not talking about your bathroom habits. I promise. Believe me, keeping up with my 3-year-old’s bathroom habits is more than enough “poo” for me. No, the no poo method I’m talking about is the practice of washing your hair without using shampoo. There are as many methods of no poo as there are people who choose to forgo shampoo. I’m just going to talk about what I know, the methods that I have tried, and how they did or didn’t work for me.

Try these easy, no fuss, no poo methods today using items already found in your home!

Try these easy, no fuss, no poo methods today using items already found in your home!

Co-Washing

I first tried this practice years ago when I started trying to learn how to work with my naturally curly hair instead of against it. I spent decades blow-drying, flat-ironing, and willing my hair straight. It always rebelled against me–frizz at any hint of moisture, poof that just wouldn’t be tamed, and curls with a mind of their own. I’m sure there are some other curly girls nodding their heads right now.

I wasn’t ready to go totally no poo so I tried co-washing, using conditioner to wash your hair instead of shampoo. I have very dry, coarse hair so I thought that this would work beautifully for me. The problem is that I also have an oily scalp. Yes, I’m so very blessed as to have combination skin and combination hair (it’s a thing, I may have just made it up, but it’s a thing). One of the points of the no poo method is that eventually you are able to go without washing your hair for longer periods. If you have hair like mine, washing it every day is the best way to kill it. So, when I was using conditioner to wash my hair, it was getting oilier quicker and I was actually having to wash it more often. I tried using shampoo every few washes to balance things back out, but eventually I just went back to using shampoo.

The baking soda/apple cider vinegar method

I started thinking about the no poo method again several months ago when I couldn’t seem to find a shampoo that worked with my hair anymore. Instead of spending a lot of money trying a bunch of different options, I decided to use what was already in my house and give true no poo a try.

There are websites and books dedicated to this topic if you want an in-depth explanation, but the no poo method is basically this–you wash your hair with baking soda and rinse with apple cider vinegar. You can make up batches of it for multiple uses, but I just made up what I was going to use before my shower and used it all in one washing. I have an old 16 oz Nalgene bottle that I use to mix up both the “shampoo” and the “conditioner.” You can use a cup, a jar, or even a cleaned out shampoo bottle.

What I do:

I take a tablespoon of baking soda and put it into the Nalgene bottle, and then add about a cup of water and shake it up really well. Then I pour it over my head little by little and massage it into my scalp just like with shampoo. Well, not “just like” shampoo because–no poo, no suds. Rinse it out.

After that I add about a tablespoon of apple cider vinegar to the bottle and dilute it with a cup of water. I pour it over my head and massage into my scalp. I add some essential oils at this point because who wants to smell like vinegar? I like rosemary, peppermint, and lavender essential oils for my hair.

Like I said, there are so many different methods. Even if you do the baking soda and apple cider vinegar method you may do it differently than me. I have not tried egg wash, bentonite clay, kefir, rye flour, or the ultimate no poo method–just water.

Deep Conditioning Mask

Try these easy, no fuss, no poo methods today using items already found in your home!

Try these easy, no fuss, no poo methods today using items already found in your home!

Because I have dry hair, this is something that I had to do from time to time even before I went no poo, but if you are doing any of the no poo methods, deep conditioning is a must.

Try these easy, no fuss, no poo methods today using items already found in your home!

I do a coconut oil mask once a month. I take about 3 tablespoons of coconut oil, add in about 5-6 drops of essential oils (again, I stick to rosemary, lavender and peppermint) and apply it to my dry hair. I give it about 30-45 minutes to do it’s magic, and then I wash it out.

This is the part when I go a bit off the no poo rails. I haven’t been able to successfully wash the mask out without using shampoo. Even with shampoo it goes a little like lather, rinse, repeat. Repeat. Repeat. I use a great sulfate-free shampoo that I really like so I don’t get too upset about it.

I hope this helps you to see that the no poo method can be simple and implemented with very few ingredients that you most likely already have. There’s more to taming my curly hair than just the no poo method, but I’ll have to share those another time!


Save

Save

Five Reusable Food Storage Alternatives

Last year for Earth Day, I wrote about how small changes can make a big impact on the environment. As I mentioned last month, I want to start sharing some of the ways you can make small changes in your home. Today, I am highlighting my favorite reusable food storage options for in the kitchen and on the go.

Five handpicked reusable food storage options for in the kitchen and on the go. Safe, simple alternatives to common disposable items in your home.

These items will help you curb your use of plastic zip top bags, plastic wrap, and other disposable food storage items we all use in the kitchen.

Five handpicked reusable food storage options for in the kitchen and on the go. Safe, simple alternatives to common disposable items in your home.

Out with the zip top bags

Five handpicked reusable food storage options for in the kitchen and on the go. Safe, simple alternatives to common disposable items in your home.

The following contains affiliate links, which means if you make a purchase from the link I get a little cash to spend at the Farmer’s Market.

1. The first reusable storage item I ever purchased (besides glassware) was the Wrap-n-Mat. My go-to lunch for work was always a sandwich and the Wrap-n-Mat wraps right around your sandwich. It also doubles as a nice placemat which comes in handy, especially on picnics with kids. Even though I don’t pack a lunch for work anymore, this sandwich bag alternative still comes in handy. The plastic on the interior allows you to easily wipe it clean, and is BPA-free.

Five handpicked reusable food storage options for in the kitchen and on the go. Safe, simple alternatives to common disposable items in your home.

2. When I saw the spbang reusable snack bag featured on TheBabyGuyNYC Facebook page, I was already sold. Then I read that you can put it right in the dishwasher to clean it! I love the the ease of this bag. It’s great for snacks, but I’ve also been known to throw crayons or dry erase markers in it. It is easy enough for Coen to open himself and pretty durable. Plus, there’s space on the back for school lunch notes or just writing your name. Check them out here.

Five handpicked reusable food storage options for in the kitchen and on the go. Safe, simple alternatives to common disposable items in your home.

3. These reusable Lunchskins bags came in one of my Might Fix deliveries. If you don’t know about The Mighty Fix, it’s a subscription service through The Mighty Nest that delivers one green living product to your home every month. This delivery came with one sandwich bag and one smaller snack bag. Both have velcro closures and a spot to write your name. This is another item that is safe to wash in the dishwasher! Yay! (Just make sure to turn them inside out to air dry after washing).


4. AtMat SplatMat is where it’s at! Seriously! I discovered these super cute reusable bags on Instagram and soon after was the recipient of one of their giveaways! These are great for snacks or sandwiches and can be washed in the washer or dishwasher. They are also safe to throw in the dryer. I usually throw them in with towels and then turn them inside out to air dry. Coen loves the Batman theme bags!

So long, plastic wrap

Five handpicked reusable food storage options for in the kitchen and on the go. Safe, simple alternatives to common disposable items in your home.

5. Bee-ing able to leave the plastic baggies and plastic wrap behind has been a long time coming in our household. I can finally say we’ve kicked both habits though! Woo! The natural, sustainable and yes, green, alternative to plastic wrap is Bee’s Wrap. I love this stuff. It’s made with organic cotton muslin, beeswax, jojoba oil, and tree resin. The antibacterial properties of the beeswax and jojoba oil help to keep food fresh and allow you to use the Bee’s Wrap again and again. Using it is super simple. Just use the warmth of your hands to help seal the Bee’s Wrap around bread, cheese, halved avocados, and bowls (no meat though, ew!). Then, wash it with cool soapy water and let it air dry. It folds up nice and small to store away until you need it again!

Five handpicked reusable food storage options for in the kitchen and on the go. Safe, simple alternatives to common disposable items in your home.

The Bee’s Wrap was another Mighty Fix item for me, but I also found it on Amazon, and locally at The Freckled Hen Farmhouse in Fayetteville. Also, be sure to head over to nwafoodie for another great post about beeswrap. Lyndi is a fellow Arkansas Women Blogger, and she’s talking about all things lovely for your kitchen!

Think you’ll give any of these reusable food storage options a try? If so, come back and let me know! I’d love to hear what you think. Most of all, just keep taking those small steps!

Save

Save

Save

Save

Save

Save

Save

Save

Save

Save

Hoof it for Heifer Trail Run

Each year that we visit Mather Lodge for the Hoof it for Heifer Trail Run, I am in awe of the gorgeous views!
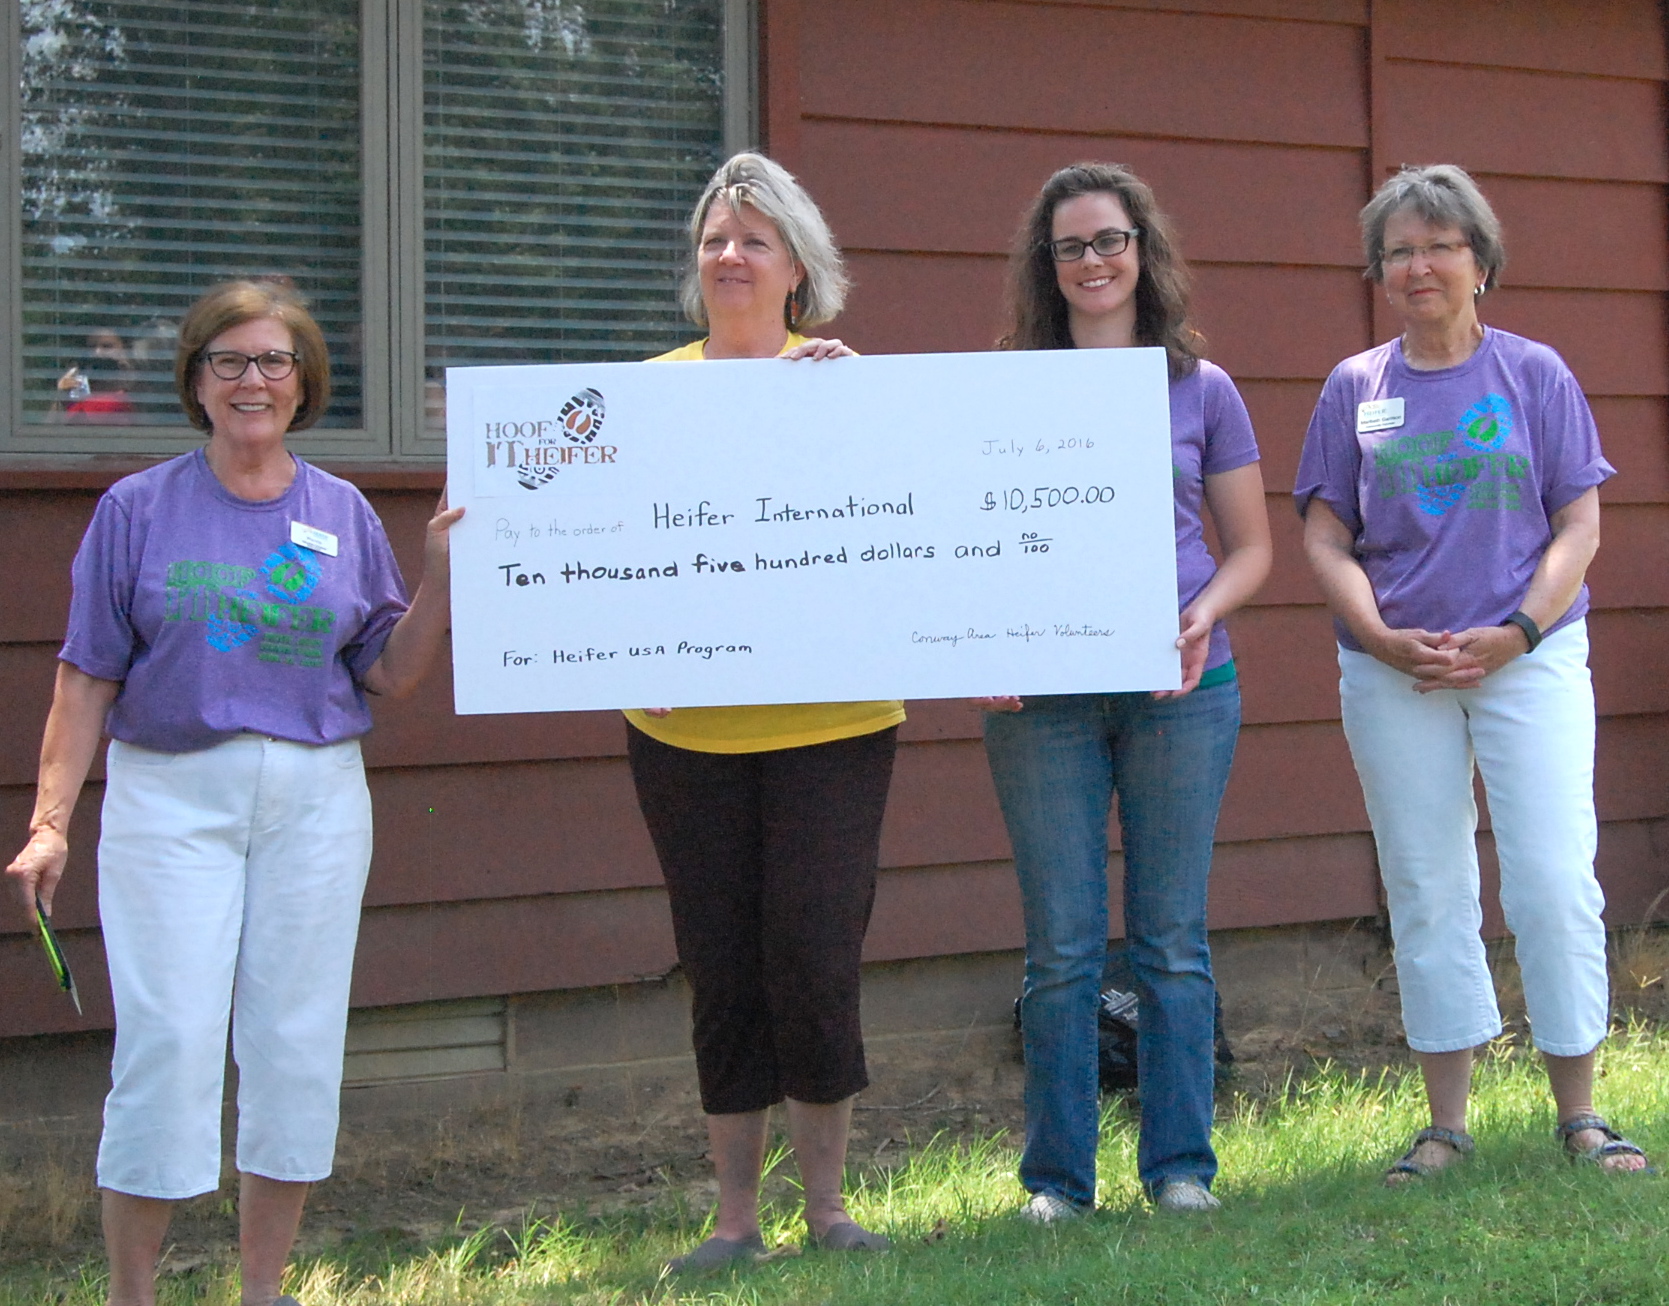
In just a little less the two weeks I’ll be waking up at Mather Lodge, eager with anticipation for the sixth annual Hoof it for Heifer trail run. Every April since 2012, we head to Petit Jean State Park to put on this 20K trail run that benefits Heifer International’s domestic program, Heifer USA.

I love that the money we raise through the Hoof it for Heifer trail run goes to help farm and food entrepreneurs right here in Arkansas. Living in Northwest Arkansas, it is sometimes easy to get into a mindset that there is not great need and poverty in our state. However, one in four Arkansans struggle with hunger.

Heifer USA

We presented a check to Heifer USA for more than $10,000, the proceeds from the 2016 Hoof it for Heifer Trail Run!

Just as with the international Heifer Projects, Heifer USA’s goal is to teach or train the farmers and ranchers, and then give them support as they get their feet on the ground.

“In Arkansas, we use a farmer-owned business model as our development approach while providing resources and technical support coordinated with local partners to invest in entrepreneurs, businesses, co-operatives, coalitions and all components of a fresh food value-chain, transforming the way people and communities produce, sell and eat their food to create new, vibrant food systems.” -Heifer USA

Not only does the program support the farmers, it also supports the community by providing healthy and nutritious food for families and schools, creating and meeting a demand for locally grown food, encouraging self-reliance and conserving our state’s rich natural resources.

Local farmers drawing on local resources and leadership to meet local need.

Heifer Ranch

You can meet Abu the camel at Heifer Ranch. Heifer Ranch is just a little more than 20 miles from Petit Jean State Park where the Hoof it for Heifer trail run is held.
Abu the camel at Heifer Ranch

And we kept the Hoof it for Heifer trail run local as well. Petit Jean State Park is just a little more than 20 miles from Heifer Ranch, the headquarters of Heifer USA. In fact, we encourage runners to go visit Heifer Ranch on race weekend if time allows.

Petit Jean State Park

The course for the Hoof it for Heifer trail run couldn’t have a more beautiful backdrop than the scenery found along the Boy Scouts of America Trail at Petit Jean! Heifer’s mission is ending hunger while caring for the Earth, and I could not think of a more perfect place to drive that message home than at one of Arkansas’ very own state parks!

Thanks to Arkansas Outside for providing photos of the Hoof it for Heifer trail run, year after year!
Thanks to Arkansas Outside for providing photos of the run, year after year!

We love putting on this race, and we love that our runners get so excited to come back each year! For a recap from a runner’s perspective, I encourage you to check out this post by Lisa Mullis of Arkansas Outside! Each year they show up not only to run, but to also take photos and share them with the runners. We are so grateful for them!

Save

Save

Worth the Wait {On growing & gardening}

Cupcakes and watermelon cake are hard to wait for when you're only 2!

Sometimes it’s hard to wait. I find myself saying this multiple times a day to my three and a half year old. I can say it without judgment or annoyance, because it’s a truth that we all face sometimes. It’s difficult to wait.

The truth is, I get impatient too. There are times when I simply don’t want to wait.

Over the last month or two, I have been developing a new objective for julianne gray. I wanted to jump right on and blog about it at the height of my excitement, but I made myself wait. During that time, I have not blogged at all. That may not have been the best decision, but I think I needed that space.

Space.

Each row of a garden needs its own space.

My garden is just getting underway; we put in the first seeds only yesterday. However, there was a lot that we had to do before we ever put a seed in the ground.

We cultivated our own compost to add to the soil (talk about worth the wait!) We planned out the garden. We purchased our seeds. We removed the winter cover. We pulled weeds. We reconfigured the layout of some of the leeks and onions that were already growing. We fertilized and tilled the soil. We made rows. We sowed the seeds.

If you are a gardener, I don’t have to tell you that these things are not just fluff (although methods vary and some do without some things I mentioned), they are necessary for plants to grow and thrive.

In this same way, I have been making plans, cultivating my ideas, and helping those ideas germinate into something bigger.

The thing is, I finally realized what I wanted to focus on here in this space, and that’s documenting the ways my family and I are trying to live with less, conserve more, and keep things simple. If that helps my readers to take small steps to grow our world into a greener place—a more sustainable, environmentally friendly place—so much the better. Confession: I don’t have all of the answers. I am not claiming that I get it all right all of the time.

What I do have is a passion for recycling, composting, growing your own food, living simply and with less, making instead of consuming, sustainability, supporting local, preserving the beauty of our world and caring for the Earth.

More details on all of this coming soon (including my garden!), I hope you don’t mind the wait.

In the meantime, I would love it if you would connect with me on Instagram and Facebook. I plan to be sharing some of those small ways we can make an impact on our world on those channels and I’d love to get your feedback!